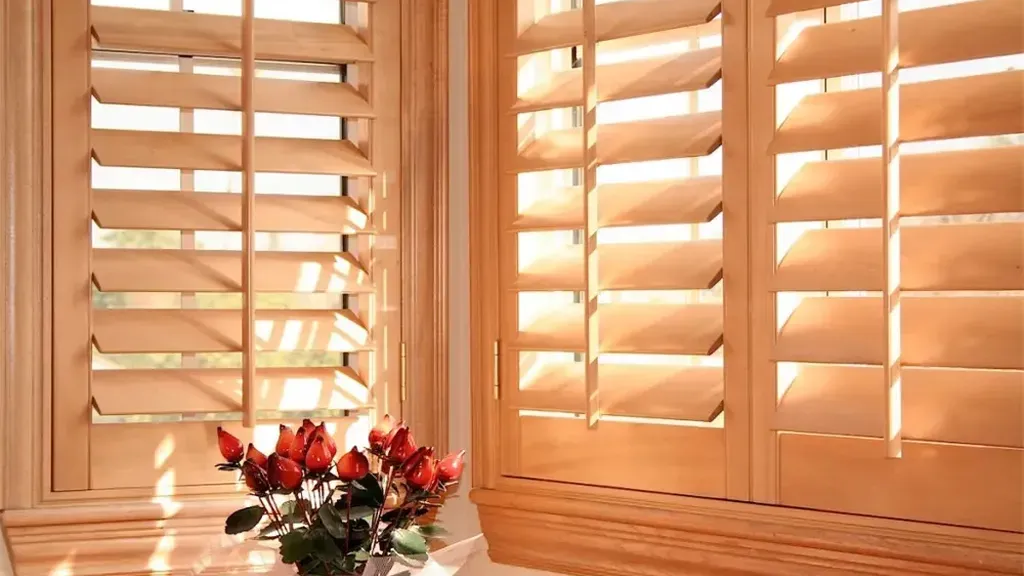
For homeowners across Southern California, from San Diego to Orange County, plantation shutters are a perfect choice for managing our beautiful sunshine in style. If you’ve decided to take on the installation yourself, you’re in the right place. This guide is packed with practical advice and expert tips to help you get the job done right. We understand that every home is unique, which is why we’ll show you how to install plantation shutters while accounting for common quirks like windows that aren’t perfectly square. Follow along to learn the techniques the pros use for a secure, beautiful installation that will stand the test of time.
Key Takeaways
- Start with precise measurements: Your project’s success begins with accurate numbers. Measure your window’s width and height in three places (top, middle, and bottom) and use the smallest measurement to ensure a perfect fit for your new shutters.
- Install with care to avoid common mistakes: A patient, step-by-step approach makes all the difference. Always pre-drill your pilot holes to prevent the frame from splitting, and use a level to confirm everything is straight before you fully tighten the screws.
- Refine the details for a professional finish: The final touches are what create a polished look. Applying a thin bead of paintable caulk to fill any gaps gives your shutters a seamless, custom appearance, while knowing when to call a pro for tricky windows is a smart move.
Gather Your Tools and Materials
Alright, let’s get everything in one place before we start. Think of it like prepping your ingredients before you start cooking; it makes the whole process so much smoother and more enjoyable. Taking a few minutes to gather your tools and materials now will save you from making frantic trips to the garage or hardware store later. A little preparation goes a long way in ensuring your plantation shutters look like they were installed by a pro. Let’s walk through exactly what you’ll need.
Essential Tools for the Job
First things first, let’s talk about the non-negotiables. You’ll definitely need a good quality tape measure to double-check your window dimensions one last time. The star of the show is your power drill; it will do most of the heavy lifting when it comes to securing the shutter frame. Make sure you have a set of drill bits handy. A level is your best friend for avoiding a crooked installation, so you can be sure your shutters hang perfectly straight. Finally, grab a pencil for marking your spots and a set of screwdrivers for any fine-tuning. These basic tools are the foundation of a successful DIY installation.
Necessary Materials
Your shutter kit should arrive with almost everything you need. Each box will contain the shutter frame pieces and the panels, often labeled to match specific windows, so be sure to check those before you unbox everything. The kit will also include the necessary hardware, like screws and hinges. It’s a good idea to have some shims on hand. These are small wedges of wood or plastic that help you get the frame perfectly square, especially in older homes where window openings might not be perfect. You’ll also want a tube of paintable caulk to fill any small gaps for a seamless, professional finish.
Optional Tools for a Flawless Finish
Ready to take your installation from good to great? A few extra tools can make a big difference. A stud finder can help you locate the most secure points in your wall to anchor the frame, which is especially helpful for larger, heavier shutters. If a frame piece is a bit snug, a rubber mallet lets you gently tap it into place without leaving a mark. It’s also smart to have a small bottle of touch-up paint or a paint pen that matches your shutters, just in case of any accidental scuffs during the process. And don’t forget a drop cloth to protect your floors and make cleanup a breeze.
Measure Your Windows for a Perfect Fit
Getting your window measurements right is the most important step for a flawless shutter installation. Think of it as creating the foundation for your project; a little extra care here pays off with a professional-looking result you’ll love for years. Accurate numbers ensure your new plantation shutters fit snugly, operate smoothly, and look like they were custom-made for your home. Before you grab your tape measure, let’s walk through the key things you need to know to get it right the first time.
Inside Mount vs. Outside Mount
First, you’ll need to decide how your shutters will be mounted. An inside mount fits neatly inside the window frame, creating a clean, built-in look that’s very popular for its seamless appearance. Just keep in mind that with an inside mount, you might have less room to tilt your windows inward for cleaning. An outside mount, on the other hand, is installed on the wall or trim surrounding the window. This is a great option if your window frames aren’t perfectly square or if you want to hide any imperfections. It can also make the window appear larger, which is a nice design trick.
How to Take Accurate Measurements
For precise results, always use a metal measuring tape, as fabric ones can stretch and give you an incorrect reading. For the width, measure across the inside of the window frame at the top, middle, and bottom. For the height, measure from top to bottom on the left, middle, and right sides. Of these three measurements for both width and height, write down the smallest one. This ensures your shutter will fit, even if your window isn’t perfectly square. If you’re between measurements, it’s always safer to round down to the nearest ⅛ inch. A tiny gap is much easier to fix with caulk than a shutter that’s too big.
Record and Double-Check Your Numbers
Once you have your measurements, write them down clearly and label them for each window, like “Living Room Left - W” and “Living Room Left - H.” It’s easy to mix up numbers, especially if you’re measuring multiple windows. Before you place your order, take a moment to double-check everything. Go back to the window and measure one more time to confirm your numbers are correct. This simple step can save you from a major headache later on. If you’re feeling at all unsure, our team is here to help. We offer mobile services across Orange, Riverside, and San Diego counties to ensure a perfect fit every time.
Choose Your Mounting Style
Before you get started, you need to make a key decision: will you use an inside or an outside mount? This choice determines where your shutter frame will sit and has a big impact on the final look. An inside mount fits snugly within the window frame for a clean, built-in appearance. An outside mount is installed on the wall or trim surrounding the window, framing it like a piece of art.
Your decision will depend on your window’s depth, its condition, and the aesthetic you’re aiming for. For example, if your window casing is shallow or not perfectly square, an outside mount is a fantastic, forgiving option. If you have deep-set windows and beautiful, decorative trim you want to show off, an inside mount might be the perfect fit. Both options look incredible when done right, so it’s all about picking the best style for your specific home and windows. Taking a moment to understand the difference will set you up for a smooth installation and a result you’ll love for years.
Why Choose an Inside Mount?
If you love a clean, seamless look, the inside mount is your best friend. This style places the shutter frame directly inside the window casing, making the plantation shutters look like an original, integrated feature of your home. It’s a popular choice because it creates a tidy profile and doesn’t cover up any decorative molding around your windows. The main requirement for this style is that your window frame must be deep enough to accommodate the shutter louvers, allowing them to open and close without hitting the glass. It’s also worth noting that an inside mount can sometimes prevent windows from tilting inward for cleaning, so keep that in mind if you have that type of window.
When to Use an Outside Mount
An outside mount is an excellent and versatile solution, especially for windows that aren’t perfectly square, which is common in many homes. Because the frame is mounted on the wall or trim around the window, it can cleverly hide any imperfections in the window casing. This style is also your go-to if your window frame is too shallow for an inside mount. As a bonus, an outside mount can create the illusion of a larger window and is often a bit faster to install. You can see beautiful examples of various installations in our project gallery to get a better idea of how this style can transform a space.
Inside vs. Outside Mount: Making the Right Choice
So, how do you choose? Think of it this way: an inside mount is for showcasing a perfect window frame, while an outside mount is for creating a perfect frame. If your windows are deep, square, and you want a minimalist look that preserves your existing trim, an inside mount is a great choice. If your windows are shallow, slightly out of square, or you want to conceal the existing casing, an outside mount is the more forgiving and practical option. When installed correctly and sealed with caulk, an outside mount looks just as custom and polished. If you’re still unsure, we’re always here to help homeowners in San Diego, Riverside, and Orange County make the right call.
Prep Your Windows for Installation
A little prep work goes a long way in making your shutter installation a success. Before you even think about picking up a drill, taking a few minutes to get your windows ready will save you time and potential headaches later. A clean, clear, and properly assessed window frame is the foundation for a beautiful, professional-looking finish. These simple steps ensure your new shutters will fit perfectly and function smoothly for years to come, whether you’re in a new build in Orange County or a classic home in San Diego.
Clean and Inspect the Window Frames
First things first, let’s create a clean slate. Start by removing any old window coverings, like curtains or blinds. Give the window frame, sill, and surrounding wall a good wipe-down to get rid of any dust, dirt, or cobwebs. This isn’t just about being tidy; a clean surface helps you see any imperfections in the frame that might need attention. Once everything is clean, take a moment to inspect the frame for any damage. Now is also a great time to unpack your new plantation shutters and make sure all the hardware is accounted for.
Check if Your Windows are Square and Level
This step is crucial, especially in older homes across Riverside County that may have settled over time. A window that looks square might not be. Use a tape measure to check the diagonals of the window opening from corner to corner. If the measurements are the same, your window is square. Next, use a level to check the sill and the top of the frame. If your window isn’t perfectly square or level, don’t panic. This is common, and you can often use shims during installation to make small adjustments. Knowing this beforehand helps you plan for a flawless fit for your new shutters.
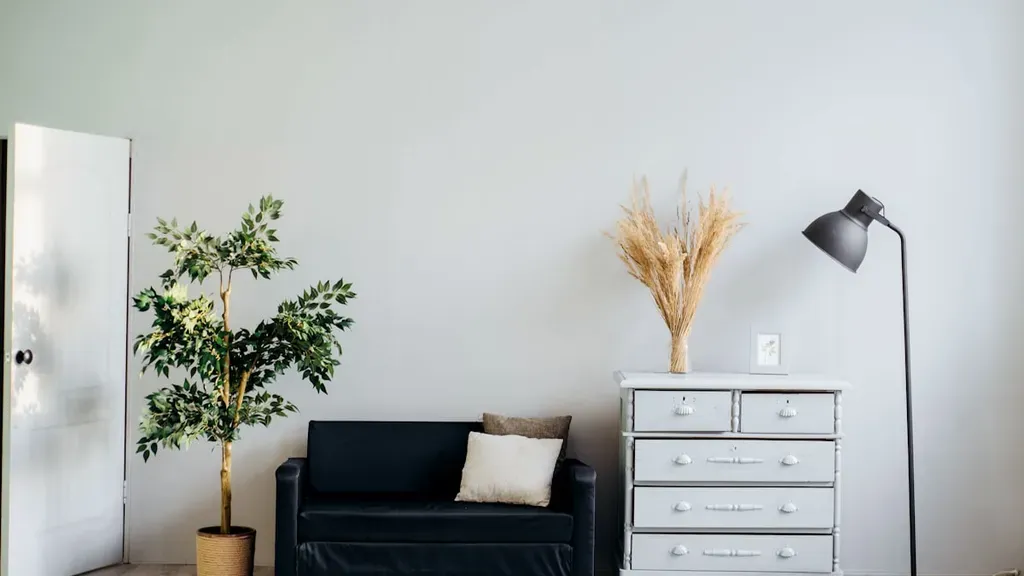
Clear Away Obstructions
Finally, give yourself plenty of room to work. Move any furniture, lamps, or decorative items away from the window. You’ll need space not just for yourself and your tools, but also for the shutter panels to swing open completely without hitting anything. This is a key consideration for functionality after the installation is complete. Take a look at our gallery to see how beautifully installed shutters operate within a room. Clearing the area ensures a safer installation process and allows you to step back and admire your work without tripping over an ottoman.
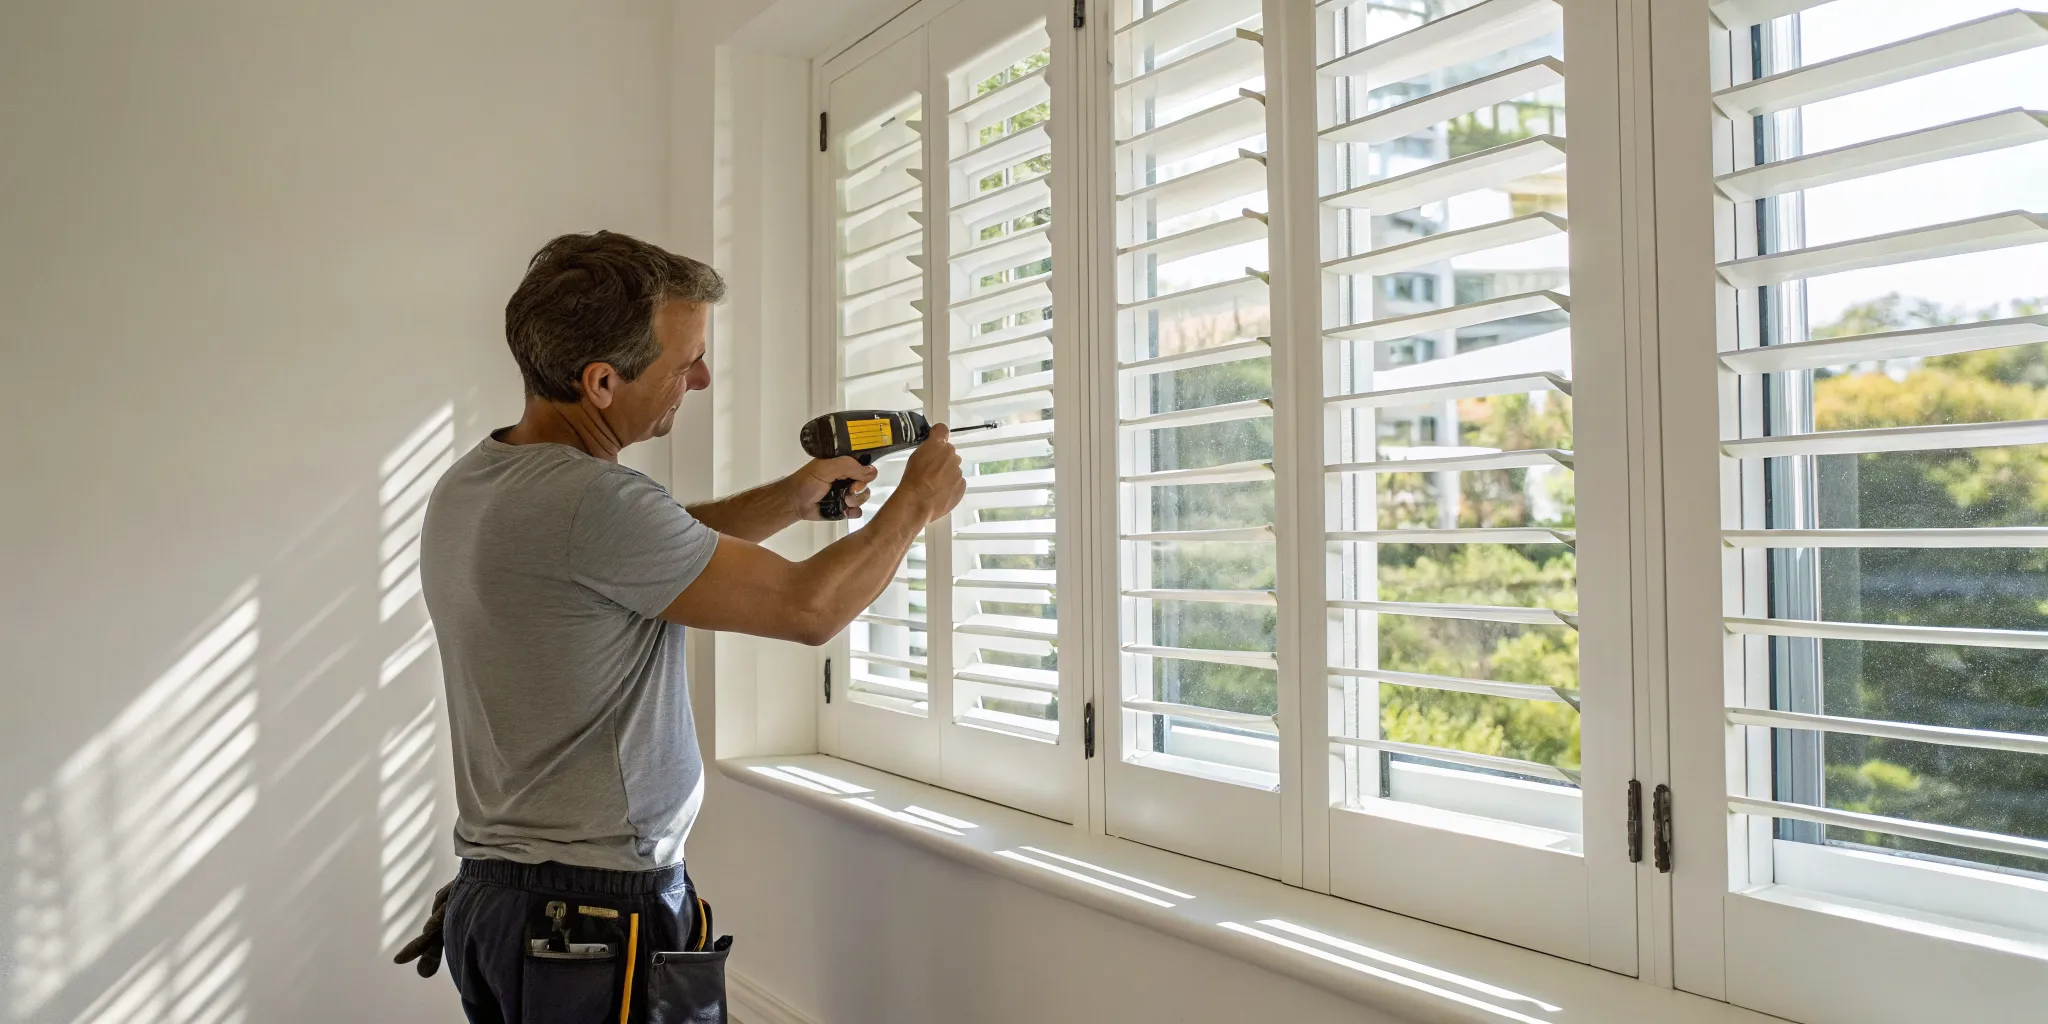
Install Your Plantation Shutters: A Step-by-Step Guide
You’ve done the hard work of measuring and ordering, and now the exciting part begins: installation. Seeing your new plantation shutters go from the box to your windows is incredibly satisfying. This guide will walk you through the process one step at a time. Remember to work carefully and take your time. While this is a manageable DIY project for many, if you ever feel unsure, our professional installation team is always ready to help homeowners across San Diego, Orange, and Riverside counties. Let’s get started on transforming your space.
Unpack and Organize Your Parts
First things first, let’s get organized. Carefully open your boxes and lay everything out on a soft surface, like a blanket or rug, to prevent any scratches. Your custom plantation shutters should arrive with each piece clearly labeled for its specific window. Group all the parts for one window together, including the frame pieces, panels, and the hardware kit. Check everything against your packing list to make sure nothing is missing. This simple step of organizing your components by window will save you a lot of time and prevent any mix-ups later on.
Mark and Pre-Drill Your Pilot Holes
Proper preparation is key to a smooth installation. Your shutter frame will come with pre-drilled holes, but you’ll need to extend these into your window frame. Hold the frame pieces in place and use a pencil to mark where each screw will go. Then, remove the frame and use a small drill bit (a 1/16” bit is usually perfect) to drill shallow pilot holes into your window frame at each mark. Pre-drilling prevents the wood from splitting when you drive the screws in and ensures they go in straight, giving you a secure and stable frame.
Install the Shutter Frame
Now it’s time to build the foundation for your shutters. Start by assembling the shutter frame pieces, usually with the provided screws or connectors. Once assembled, place the frame inside your window opening. Make sure it’s snug and perfectly aligned. Use a level to check that it’s straight both horizontally and vertically before you secure it. Drive the mounting screws through the pre-drilled holes in the frame into the pilot holes you made in the window jamb. Don’t tighten them all the way at first; get them all started, then go back and tighten them securely for a perfect fit.
Attach the Panels and Test
This is the moment you get to see it all come together. To hang the panels, align the hinges on the panel with the corresponding hinges on the frame. Slide the hinge pins into place to connect them. Many shutters have small magnets that help hold the panel steady while you do this. Once all the panels are hung, it’s time for a test run. Gently open and close each panel, and operate the louvers to make sure everything moves freely without any sticking or rubbing. You can see examples of flawlessly installed shutters in our project gallery.
Avoid These Common Installation Mistakes
Even the most careful DIYer can run into a few snags. When it comes to installing plantation shutters, a few common mistakes can turn a straightforward project into a frustrating one. The good news is that they are all completely avoidable with a little bit of foresight. Taking your time and paying attention to the details will ensure your new shutters look like they were installed by a pro.
We’ll walk through the most frequent missteps, from getting the initial measurements wrong to dealing with tricky hardware and unsightly gaps. By knowing what to watch out for, you can sidestep these issues and achieve a beautiful, seamless finish that will transform your space. Let’s get your installation on the right track from the very beginning.
Inaccurate Measurements and Marks
The success of your entire project hinges on accurate measurements. A small error here can lead to shutters that don’t fit properly, so it’s worth taking extra care. Always use a steel measuring tape for the best precision. For each window, measure the width and height in three separate places: top, middle, and bottom. It’s a crucial step because window frames are rarely perfectly square. When you order your plantation shutters, use the smallest of the three measurements for both width and height to ensure a snug fit. For larger windows, grab a friend to help hold the tape measure steady and double-check your numbers.
Drilling and Hardware Mishaps
Drilling into your brand-new shutter frame or your window casing can feel a bit nerve-wracking, but a few simple tricks make it foolproof. The most important rule is to always pre-drill your holes. This creates a clean guide for the screw and prevents the wood or polycore material from splitting. Use a small drill bit to create these pilot holes before driving in any screws. You might also find that the pre-drilled holes on the shutter frame don’t align perfectly. If that happens, just use a 1/16” drill bit to drill straight through them while the frame is lying flat for a perfect match.
Poor Alignment and Gaps
After all your hard work, the last thing you want to see are noticeable gaps between the shutter frame and your window frame. These small imperfections can detract from the final look, but they are easy to fix. For an inside mount, a thin bead of paintable caulk is your best friend. Carefully apply it to any gaps where the frame pieces meet or where the shutter frame meets the window. Wipe away the excess with your finger, then smooth the line with a damp paper towel for a clean, professional finish. This simple step makes a huge difference and creates the flawless look you can see in our project gallery.
Add the Finishing Touches
You’re in the home stretch! Your shutters are up, and they already look fantastic. Now it’s time for the final details that will take your installation from good to truly professional. These finishing touches are what separate a standard DIY job from a seamless, custom-fit look that feels like it was always part of your home. Taking a little extra time here ensures your new plantation shutters not only look perfect but also function flawlessly for years to come. It’s all about refining the fit, sealing the edges, and making those tiny adjustments that make a huge difference in the final result.
Think of it as the final polish on a beautiful piece of furniture. These steps will address any minor imperfections, ensure smooth operation, and create clean lines that blend perfectly with your window frames. You’ve done the hard work of measuring and mounting, and this last phase is where you get to perfect the outcome. It’s incredibly satisfying to see everything come together so cleanly. Let’s walk through these last few steps to get your project over the finish line and achieve that polished, high-end look you’re aiming for.
Fine-Tune the Panel Movement
Once the panels are hanging, open and close them a few times. Do they swing smoothly without catching or rubbing against the frame? If not, you may need to make small adjustments to the hinges. Sometimes, slightly tightening or loosening a hinge screw is all it takes to get the alignment just right. The goal is to have each panel operate effortlessly. This step is crucial for daily usability, ensuring your shutters are a joy to use, not a hassle. A perfectly functioning shutter panel is a clear sign of a quality installation, giving you that satisfying, solid feel every time you open or close them.
Caulk Any Gaps
Take a close look at where the new shutter frame meets your window opening. It’s common to have small, uneven gaps, especially in older homes. Filling these with a thin bead of paintable caulk creates a clean, built-in appearance. Simply apply the caulk along the gap, run a damp finger over it to smooth the line, and wipe away any excess with a wet paper towel. This not only makes your shutters look more integrated with the window frame but also helps block drafts, adding a bit of extra insulation to the room. It’s a simple trick that makes a world of difference in the final look.
Make Final Adjustments
Give your new shutters one last look-over. Check that all the louvers tilt in unison and close tightly. Make sure every screw is secure and that the panels are perfectly aligned when closed. This is your chance to correct any minor imperfections you might have missed. Step back and admire your work from different angles in the room. When you’re happy with how everything looks and operates, you can officially call the job done. These final tweaks ensure your shutters look as good as the ones you’d see in our gallery, giving you a result you can be proud of for years.
How to Troubleshoot Common Problems
Even with the most careful planning, you might run into a small hiccup during your installation. Maybe a shutter panel doesn’t close quite right, or you notice a screw has gone missing from the hardware pack. The good news is that these are usually minor issues with very simple solutions. Before you get frustrated, take a moment to run through these common troubleshooting steps. Most of the time, a quick adjustment is all you need to get your new shutters looking and functioning perfectly. We’ll walk through a couple of the most frequent issues and show you how to fix them in minutes.
Fix Misaligned Shutters
If you’ve hung your plantation shutters and the louvers aren’t closing correctly, there’s a very common reason: the panel is probably upside down. It’s an easy mistake to make in the process. Here’s the quick check: try closing the louvers. They are designed to close tightly in the up position, which gives you a clean look and the best light control. If your louvers point downward when you try to close them, you’ve found the problem. Just unhinge the panel, flip it 180 degrees, and hang it again. This simple fix almost always solves the issue.
Solve Hardware and Panel Issues
Misplacing a screw or discovering that pre-drilled holes don’t line up perfectly can feel like a roadblock, but these are manageable hardware problems. If a screw from your kit goes missing, you can easily find a replacement; a standard 2-inch threaded screw will usually do the trick. For misaligned holes in the frame, grab a 1/16” drill bit. With the frame lying flat, carefully drill straight through the existing holes to create a clean, direct path for the screw. This ensures your shutters are mounted securely without putting any unnecessary stress on the frame.
Know When to Call a Pro
Taking on a DIY project can be incredibly rewarding, but it’s also wise to know your limits. While installing standard shutters on a simple window is manageable for many, some situations are best left to those with years of experience. Think of it this way: a professional ensures your investment not only looks fantastic but also functions perfectly for years to come. If you’re feeling unsure at any point, it’s a smart move to get an expert opinion.
Professionals have seen it all, from quirky window frames to unexpected structural issues. They have the specialized tools and know-how to guarantee a flawless, custom fit that’s difficult to achieve on your own. For homeowners in San Diego, Riverside, and Orange County, our team can handle the entire process, giving you peace of mind and a beautiful result without the weekend-long headache.
For Complex or Unusual Windows
If your home features anything beyond a standard rectangular window, it’s a good time to consider professional help. Bay windows, arched windows, circular openings, or extra-large glass doors require precise measurements and specialized techniques that go beyond a typical DIY guide. Getting these wrong can lead to awkward gaps, poor operation, or an unprofessional finish that detracts from the elegance of your Plantation shutters. An expert can create a custom template and install your shutters to fit every curve and angle perfectly, ensuring they look like a seamless, built-in feature of your home.
When You’re Short on Time or Tools
Let’s be realistic: a shutter installation can easily consume an entire weekend, especially if you’re new to the process. If your schedule is already packed, handing the job over to an expert is a great way to save valuable time and avoid stress. A professional team can typically complete an installation in just a few hours. Plus, they arrive with every tool needed for the job, so you won’t have to make last-minute trips to the hardware store. Opting for professional installation means you can simply relax and enjoy the finished product without the hassle.
Related Articles
- Affordable Plantation Shutters: A Buyer’s Guide
- Custom Plantation Shutters: The Ultimate Guide
- Custom Interior Plantation Shutters: A Buyer’s Guide
- Plantation Shutters Installation: A Step-by-Step Guide
Frequently Asked Questions
What is the single most important step I shouldn’t mess up? Getting your window measurements right is, without a doubt, the most critical part of the entire process. Everything else flows from this foundation. An accurate measurement ensures your custom shutters will fit perfectly, which makes the actual installation much smoother. Take your time, use a metal measuring tape, and check your numbers twice before placing your order. A small mistake here can cause a big headache later.
How long should I expect this installation to take? The time it takes can vary quite a bit depending on your comfort level with DIY projects and the number of windows you’re doing. For your first window, I’d set aside a couple of hours to get familiar with the process without feeling rushed. Once you get the hang of it, you’ll find a rhythm, and each additional window will go much faster.
My window frame isn’t perfectly square. Can I still install shutters myself? Yes, absolutely. It’s very common for window frames, especially in older homes, to be slightly out of square. This is exactly why choosing the right mounting style is so important. An outside mount is a fantastic and forgiving option because it covers the window casing and can hide those imperfections. If you’re set on an inside mount, you can use small wedges called shims to get the frame perfectly level and square before you secure it.
Is using caulk at the end really that important? It might seem like a small detail, but applying a thin bead of caulk is the secret to achieving that polished, professional look. It fills any minor gaps between the shutter frame and your window frame, creating a seamless, built-in appearance. This simple step makes a huge visual difference and is what separates a good installation from a great one.
I’m feeling a bit overwhelmed. How do I know if I should call a professional instead? Trust your gut. If you have complex windows like arches or bay windows, or if the thought of the project is causing more stress than excitement, it’s a great time to call for help. A professional installation guarantees a perfect fit without you having to sacrifice your weekend. Our teams in San Diego, Riverside, and Orange County can handle the entire process for you, ensuring a flawless result.